A day of drum sounds!
Drums and vocals are what hits us first time we hear a song, so it’s crucial to record these well.
Just as with vocals, poorly tuned or recorded drums can be a big distraction from the message of a song. That’s why a great drum sound is one of the holy grails of music production – and yet it is also one of the trickiest to master. Clients have been very happy with drums recorded in my studio, but there usually isn’t time during a session for experimenting with sounds, especially “big movements” like the following;
- Different positions of the drum kit in the studio.
- Different overhead microphone techniques.
- The amount of acoustic dampening in the studio.
I wanted to experiment with these, and my drummer friend Andrew Samson was similarly enthusiastic, so we dedicated a day in my studio to it. I figured that once we had experienced all the different sounds and taken notes, I’d be able to setup whichever was the best for a particular piece of music more quickly. Less time setting up means more time for recording music!
It was a lot of fun exploring the possibilities in this session, and thought you might also enjoy the trip. To get the best from the sounds, especially variations in stereo depth, I’d recommend listening on good monitors or headphones.
Close micing
A purely close mic’d drum kit has one or more mics dedicated to each drum and cymbal. These are mixed together to give the sound of the whole kit. It gives a very dry close up sound, as if you had many ears right up against each drum at the same time, but quieter. Drums are usually heard much further away than this though, so realism is often added by blending in overhead mics, room mics, or ambient reverb. But the bulk of the sound comes from the close mics.
It’s a good choice if you’re after a very direct dry sound, envisage lots of drum edits, or are considering sample replacement of individual kit pieces afterwards. As it excludes a lot of room sound, it’s also useful for recording drums in a room with poor acoustics. Caution must be exercised, however, as the more mics you point at an instrument, the more phase problems between mics can occur. This can make your drums sound weak, flangy, or just downright terrible, defeating the point of the whole exercise.
Ambient micing
Ambient micing is another way, and uses fewer mics further away to record the sound of the whole drum kit at once. Seems entirely reasonable since this is how we actually hear drums, and many of the world’s best recordings have used this technique. It lessens the chance of phase issues, and is quicker to setup and mix. Close mics can be blended in from on one or more kit pieces e.g. kick and snare for a more direct or powerful sound, but the bulk of the sound comes from the overhead or room mics.
The downsides? As the sound from all drums goes into the ambient mics, editing or sample replacing individual drum hits is much harder, and more room sound will be recorded. To get the best from this technique you need a great drummer playing a well tuned and balanced kit in a room with good acoustics. For this session we have all these, and so decided to focus mainly on the ambient mic sound.
Where to put the drums?
First thing was to establish the best sounding position and angle for the drums. Several recordings established that towards the back of the studio facing forward gave the most solid stereo image in the overhead mics. This is how I’d always setup drums here, but it was reassuring to have it proven beyond doubt.
Drum Overhead Mic Setup Comparison
We used two AKG C451 B small diaphragm cardioid condensers. With each mic configuration we tried to keep the kick and snare drums as central as possible in the stereo image. In modern music the kick and snare close mics will inevitably be mixed to centre, and it is crucial that the drum overheads are consistent with this. If they are not the kick and snare tend to wander over the stereo image, losing balance and power, and mixing becomes trickier.
Widely Spaced Pair
Was the first setup. Stereo separation comes from the volume difference and time taken for the sound from each drum to reach the mic. It gives a very wide stereo image, but can have phase problems when listened to in mono. This means some drums may appear much quieter than others on mono (or effectively mono) devices likes smartphones, tablets, laptops or televisions. It was also impossible to get the kick and snare drum centred without making the balance of the toms and cymbals uneven.
On the upside, it gives a huge, larger than life sound, as if your drummer has arms 20 feet long. And sometimes that is really, really good.
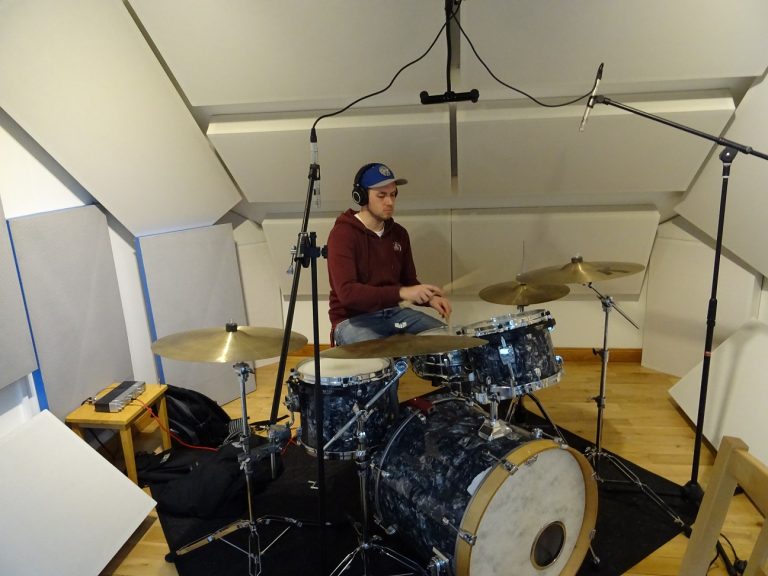
Stereo spaced pair overhead drum mics. We set the kit at an angle to see if having the snare and kick drums in a line up the centre of the room made for a better recording. It did not – lining up the kit with Samson facing forward was better.
XY
Next was XY – both microphone capsules are virtually in the same place, so stereo separation comes purely from volume differences across across the kit. Sounds from each kit piece arrive at both mics simultaneously, so phase problems won’t happen, and mono compatibility is guaranteed. This could be a good choice if translation to mono devices like smartphones is important.
The mics are pointing outwards, which tends to favour drums on the outside of the kit more than the centre. This might be good if you want to leave a sonic gap to bring in a close mic on the snare, or bad if you prefer a more holistic sound. In the past I’ve used it for jazz recordings where the drummer preferred the cymbals to feature more than the snare.
The sound is very mono and static, with the hi-hats almost in the centre – perhaps useful for LCR mixes or music with intricate panned elements, like distorted guitars in heavy rock that is typically mastered quite loud.
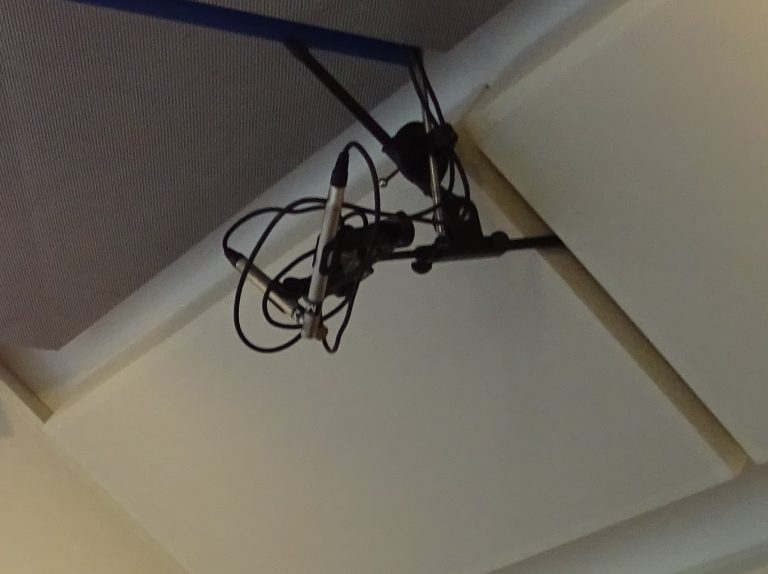
Drum overheads in XY configuration.
ORTF
Next we used a more or less modified ORTF arrangement. With ORTF the mics point outwards at 110 degrees with a distance of 17cm between the capsules, a bit like a human head. So in theory it should give a stereo representation similar to what we actually hear.
We tried it this way and it was ok, but Samson suggested angling the mics so each pointed to the middle of a circle encompassing the toms & cymbals on each side of the kit. And it was much better! The stereo image was somewhere between XY and spaced pair. As the mics are quite close together, phase issues are far less likely than with spaced pair, although note completely eliminated as with XY.
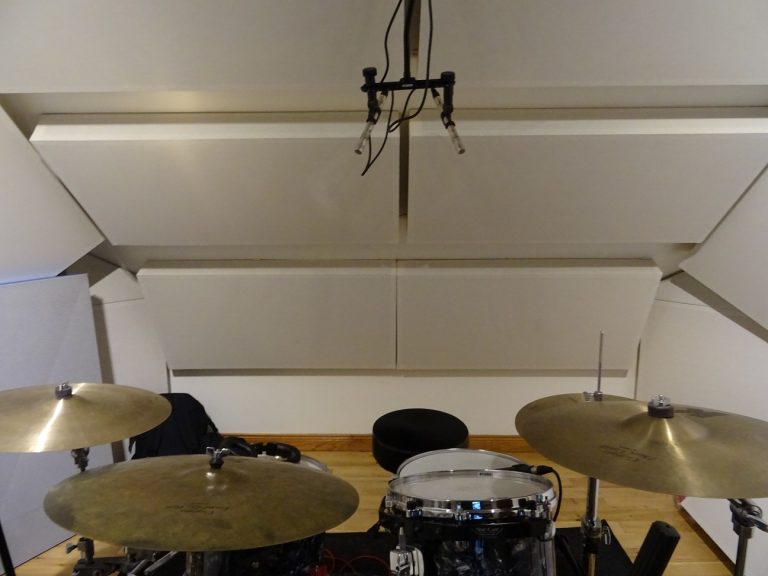
Drum Overhead Mic Position
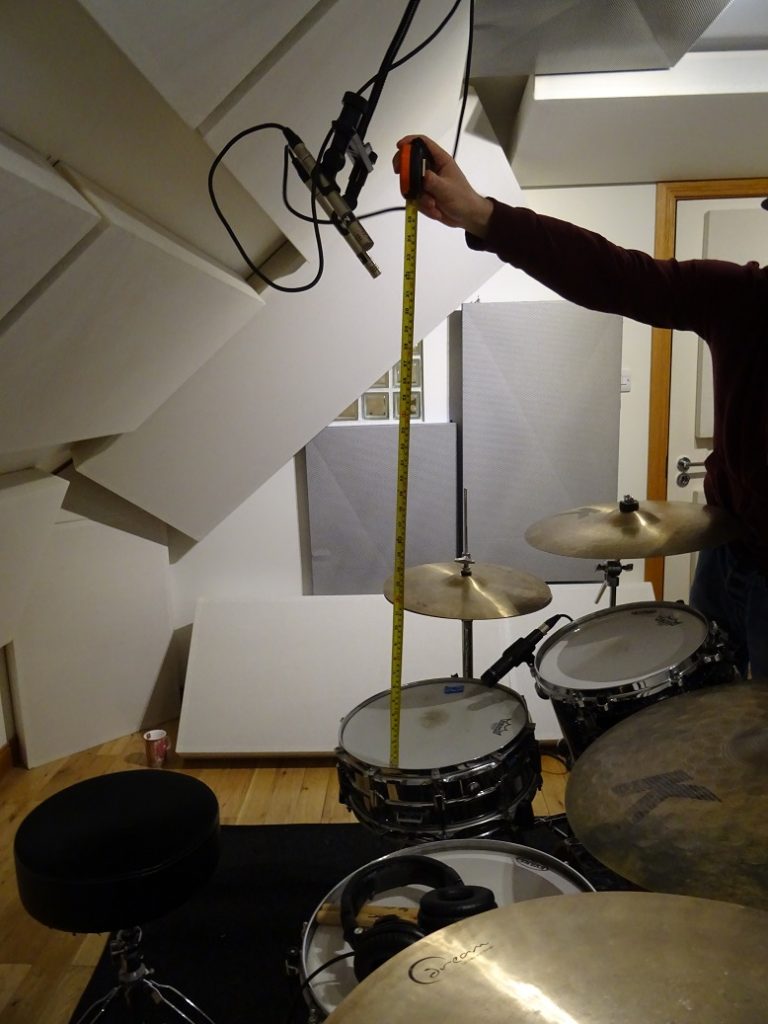
It’s pretty much given that these mics should be positioned centrally across the kit, but what about height? 80cm above the snare gave a really nice balance of all the drums and cymbals.
Longitudinally, the best recording had the mics towards the drummer’s side of the kit. Apparently mics are usually placed further forward, but the proof of the pudding is in the eating!
Room Mic
A microphone placed significantly further away than the overheads can add spice and character to a recording – a classic example is John Bonham’s drum sound on “When The Levee Breaks”. The mic doesn’t have to be in the same room, it could even be in a stairwell outside the studio. Extreme compression can help bring out the character of the drums in the room, even when mixed into the main kit sound in small doses.
We tried a Rode NT1000 (large diaphragm cardiod) and Behringer ECM8000 (small diaphragm omnidirectional) at the other end of the studio. Most likely because of its omnidirectional pickup pattern, the ECM8000 gave the biggest, fattest, chunkiest sound by far, so that’s what we used.
And again with some compression and EQ
Close Mics
Having close mics on the kick and snare drums gives some flexibility on the drum sound that overheads alone could not provide. Bringing them into the mix can add directness and punch to these drums, crucial in rock and pop music. It also allows processing like gates and reverb (and even gated reverb!) to be applied without affecting the rest of the kit.
We used the classic Shure SM57 dynamic mic on the snare, and it performed fabulously. The AKG D112 for the kick didn’t seem to be functioning… it, ah, lacked kick… so we employed the good old Shure SM58 as an emergency measure. With a bit of low end boost, it did an admirable turn.
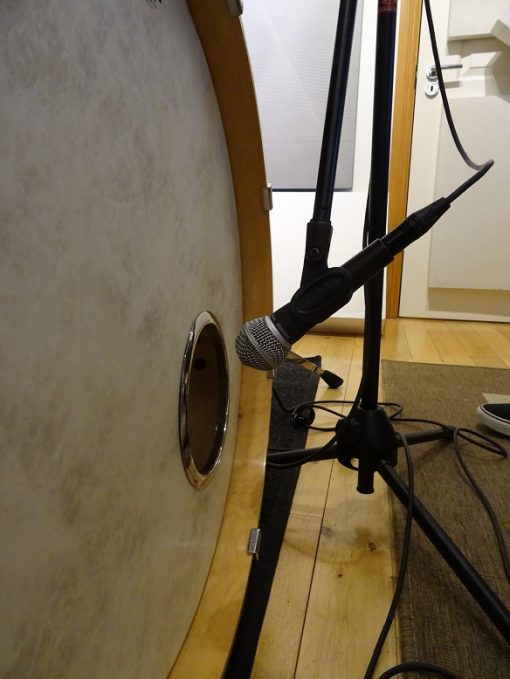
Shure SM58 on kick drum. It’s a few inches out from centre top of the sound hole, pointing in at an angle.
Here’s a clip with overhead, room, kick and snare mics mixed together. There’s a little bit of ambient reverb on the overheads.
The effect of removing a few acoustic panels?
We removed some 4×2′ bass traps from the front of the studio, and the effect Was exactly as you would predict – a slight increase of room sound in the overhead and room mics. The kit sounded a bit livelier, but also less defined. We preferred the sound when they were in place.
So which is best?
For drums alone Samson and I liked the modified ORTF arrangement most of all. In terms of pure feel, excitement and immediate impact it just sounded best to us. The stereo image is enough to give movement to the music, yet mono compatibility is retained, and every drum and cymbal in the whole kit is well represented.
Yet drums usually feature in the wider musical context of a song, so what is best will of course vary depending on that song – vocals, instruments, arrangement, volume, power, feel, size, width, you name it! It’s not something you can calculate, but after hearing the sounds today, I’ll be able to figure it out more quickly when I hear it.

Really useful guide, especially if time is short and resources are limited. Thank you!
Thanks Dirk. I think there’s a lot to be said for getting setup and into the music quickly. It’s good to keep things fresh and focus on the music, endless tweaking of mics etc. can be a bit of an energy drain.
When mic’ing the kick do you prefer to put the mic in the port, on the face of the skin or at right angles to the port and slightly to the side?
For this session, Samson found the best place was a few inches out from top centre of the port, pointing in at an angle. I’ve added a photo of it in the close mic section. Looking back through my session logs, I’ve placed the kick mic in many different positions. Sometimes inside the drum, sometimes near the skin. It all depends on the drum, the drummer, the tuning, and the music. Several jazz sessions had a kick drum without a port, which makes the decision easier 🙂
As an aside, I get HUGE kick sound in the room mic. I discovered a lovely bit of bass boost in just frequencies at this location when recording congas.